| #
./vmware-install.pl
(run the
install script) Creating a new VMware Player installer database using the tar4 format. Installing VMware Player. This may take from several minutes to over an hour depending upon its size. In which directory do you want to install the binary files? (where the execs will sit, /usr/bin for any Linux distro) [/usr/bin] What is the directory that contains the init directories (rc0.d/ to rc6.d/)? (in a fedora box, this is exactly where they are) [/etc/rc.d] What is the directory that contains the init scripts? (same as above) [/etc/rc.d/init.d] In which directory do you want to install the daemon files? (this should be the same on most general distros) [/usr/sbin] In which directory do you want to install the library files? (pretty much a vmware thing, but the program makes this directory, just hit enter) [/usr/lib/vmware] The path "/usr/lib/vmware" does not exist currently. This program is going to create it, including needed parent directories. Is this what you want? [yes] yes In which directory do you want to install the documentation files? (yes, whatever) [/usr/share/doc/vmware] The path "yes" is a relative path. Please enter an absolute path. In which directory do you want to install the documentation files? (yeah) [/usr/share/doc/vmware] The path "/usr/share/doc/vmware" does not exist currently. This program is going to create it, including needed parent directories. Is this what you want? [yes] The installation of VMware Player 2.0.0 build-45731 for Linux completed successfully. You can decide to remove this software from your system at any time by invoking the following command: "/usr/bin/vmware-uninstall.pl". Before running VMware Player for the first time, you need to configure it by invoking the following command: "/usr/bin/vmware-config.pl". Do you want this program to invoke the command for you now? [yes] (now the second phase of the install) Making sure services for VMware Player are stopped. Stopping VMware services: Virtual machine monitor [ OK ] Configuring fallback GTK+ 2.4 libraries. In which directory do you want to install the theme icons? (pretty much standard fare) [/usr/share/icons] What directory contains your desktop menu entry files? These files have a (this is where the files sit on a fedora distro, if you don't know where these are, .desktop file extension. [/usr/share/applications] just do a find for *.desktop files and find out the path and fill that in here) In which directory do you want to install the application's icon? (yeah, whatever you say) [/usr/share/pixmaps] Trying to find a suitable vmmon module for your running kernel. (most likely fail here) None of the pre-built vmmon modules for VMware Player is suitable for your running kernel. Do you want this program to try to build the vmmon module for your system (you need to have a C compiler installed on your system)? [yes] Using compiler "/usr/bin/gcc". Use environment variable CC to override. What is the location of the directory of C header files that match your running (now, if you don't have kernel header files here, you need to get them, because the program will build modules for your specific kernel. In fedora, you can just yum for these files, eg- yum install kernel-devel) kernel? [/lib/modules/2.6.20-1.2307.fc5/build/include] (or wherever your distro keeps it's kernel dev files) a whole lot of messages appear here as your Linux machine builds modules for vmware, note, obviously if you update your kernel, you will have to re-compile this, but it's pretty much just re-running vmware-install.pl again. Then it asks you if you want to configure your Ethernet, I recommend using only the bridged net options, if you try to start messing with the NAT or host only networking options, you have to know what you are doing and the build instructions are a bit obscure, so I answer yes to the first question, and that configures bridging, and no to the other two about NAT and host only. Do you want networking for your virtual machines? (yes/no/help) [yes] (bridged networking) Configuring a bridged network for vmnet0. The following bridged networks have been defined: . vmnet0 is bridged to eth0 (sorted! Yay!) All your Ethernet interfaces are already bridged. Do you want to be able to use NAT networking in your virtual machines? (yes/no) [yes] no (not unless you are creating a firewall-type box) Do you want to be able to use host-only networking in your virtual machines? [no] (dunno what this does yet, but I can tell you it caused havoc with my first attempt at install because it started a DHCP server, killed my home network in the process because I had a DHCP server already, LOL) and after a few lines... it presents you with... You can now run VMware Player by invoking the following command: "/usr/bin/vmplayer". |
| qemu-img create -f vmdk winXP.vmdk 5G |
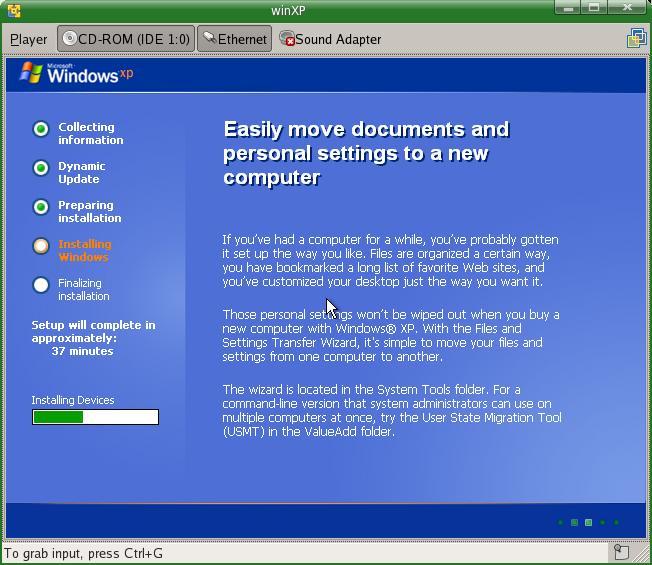
| #!/usr/bin/vmware config.version = "8" virtualHW.version = "4" memsize = "256" # this line tells vmware how much memory it can use for this particular virtual machine ide0:0.present = "TRUE" # obviously lets vmware know if there is ide present ide0:0.fileName = "winXP.vmdk" # lets vmware know where the image file is ide1:0.present = "TRUE" # points machine to cdrom location for your install point it to an ISO image of your OS ide1:0.fileName = "/path/to/iso" # where the install iso is on your disk ide1:0.deviceType = "cdrom-image" # filetype of cd-rom floppy0.present = "FALSE" # no need for floppy disk really, change to TRUE if you want #floppy0.fileName = "/dev/fd0" # I have commented this out, but you will need to point floppy device to this if you want to use floppy ethernet0.present = "TRUE" # the Ethernet config. usb.present = "TRUE" # whether USB is used or not. sound.present = "TRUE" # sound, do you need it? sound.virtualDev = "es1371" # what the virtual sound uses displayuName = "winXP" # just a display name, you can call it jeremy if you want. guestOS = "winXPPro" # this is apparently important to vmware, there are a list of supported OS's later on. scsi0:0.redo = "" ethernet0.addressType = "generated" displayName = "winXP" checkpoint.vmState = "test.vmss" ide0:0.redo = "" |
| Microsoft Windows, 32-bit • winVista = Windows Vista (experimental) • longhorn = Windows Longhorn (experimental) • winNetBusiness = Windows 2003 Small Business Server • winNetEnterprise = Windows 2003 Enterprise Server • winNetStandard = Windows 2003 Server • winNetWeb = Windows 2003 Web Server Edition • winXPPro = Windows XP Professional Edition • winXPHome = Windows XP Home Edition • win2000AdvServ = Windows 2000 Advanced Server • win2000Serv = Windows 2000 Server • win2000Pro = Windows 2000 Professional • winNT = Windows NT • winMe = Windows Me • win98 = Windows 98 • win95 = Windows 95 • win31 = Windows 3.1 / Windows 3.11 • windows = Other Windows Microsoft Windows, 64-bit • winVista-64 = Windows Vista x64 Edition (experimental) • longhorn-64 = Windows Longhorn x64 Edition (experimental) • winNetEnterprise-64 = Windows 2003 Enterprise Server x64 Edition • winNetStandard-64 = Windows 2003 Server x64 Edition • winXPPro-64 = Windows XP Professional x64 Edition Linux, 32-bit • ubuntu = Ubuntu Linux • redhat = Red Hat Linux • rhel4 = Red Hat Enterprise Linux 4 • rhel3 = Red Hat Enterprise Linux 3 • rhel2 = Red Hat Enterprise Linux 2 • suse = SuSE Linux • sles = SuSE Linux Enterprise Server • mandrake = Mandrake Linux • nld9 = Novell Linux Desktop 9 • sjds = Sun Java Desktop System • turbolinux = Turbo Linux • other26xlinux = Other Linux on a 2.6.x kernel • other24xlinux = Other Linux on a 2.4.x kernel • linux = Other Linux Linux, 64-bit • ubuntu-64 = Ubuntu Linux 64-bit • rhel4-64 = Red Hat Enterprise Linux 4 64-bit • rhel3-64 = Red Hat Enterprise Linux 3 64-bit • sles-64 = SuSE Linux Enterprise Server 64-bit • suse-64 = SuSE Linux 64-bit • other26xlinux-64 = Other Linux 2.6.x 64-bit • other24xlinux-64 = Other Linux 2.4.x 64-bit • otherlinux-64 = Other Linux 64-bit |